
Console Chronicles: Your First Conversation with a Cisco Device
How to Access and Configure Your Cisco Device for the First Time
First Listen: let your ears lead the way before your mind takes notes.
📻 FZ2CCNA Radio:
Then read: let your eyes explore before your mind starts to explain.
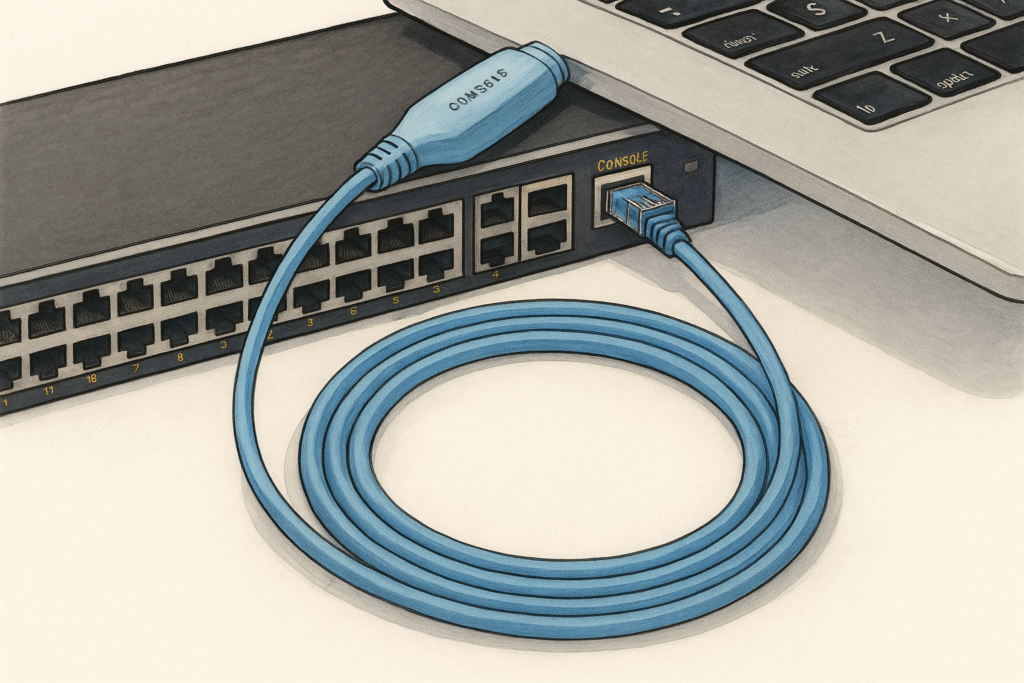
Connecting to a Console Port
Introduction: Why Console Ports Matter
Imagine you’ve just unboxed a shiny new Cisco switch or router. You plug it in, and those little green lights start blinking. Great, right? But here’s the catch: it’s not on the network yet, it has no IP address, and it doesn’t even know who you are. You can’t SSH into it. You can’t Telnet into it. It’s basically like buying a smartphone that hasn’t been set up yet — no Wi-Fi, no apps, nothing.
So how do you talk to it for the very first time?
You use the console port.
This is your backstage pass into the device. The console port lets you connect directly to the router or switch, even if it’s brand new or misconfigured. It’s the ultimate safety net.
What is a Console Port?
The console port is a special physical interface on Cisco networking gear that allows direct local access. Think of it as:
- The keyboard/screen combo of your network device.
- A lifeline when remote access is down.
- The first step in setting up or troubleshooting a router/switch.
It’s usually an RJ-45 port (looks like a small Ethernet port) or, in newer devices, a USB mini-B console port.
The Tools You Need
Before you can chat with your Cisco gear, you’ll need a few essentials:
- Console Cable
- Traditionally: a light blue rollover cable (Cisco’s classic).
- Newer models: a USB-to-mini-B cable.
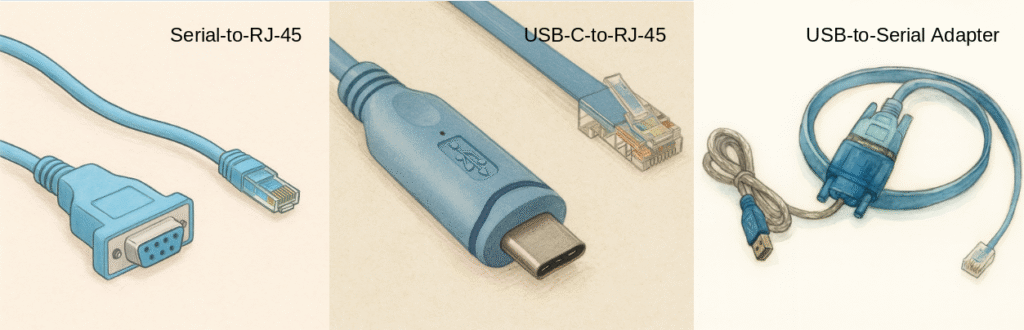
- Adapter (if needed)
- If your laptop doesn’t have a serial port (spoiler: most modern ones don’t), you’ll need a USB-to-serial adapter.
- Terminal Emulator Software
- This is your “chat window” with the device. Popular options:
- PuTTY (Windows)
- Tera Term
- SecureCRT
- On macOS/Linux: the built-in Terminal +
screencommand
- This is your “chat window” with the device. Popular options:
How to Connect Step by Step
Alright, let’s get practical. Here’s the process, CCNA style:
Step 1: Cable Up
- Plug one end of the console cable (ONLY RJ-45 connector) into your device’s console port.
- Plug the other end into your laptop (via USB or adapter).
Step 2: Launch Your Terminal Program
Open PuTTY (or your favorite emulator). Select Serial as the connection type.
Step 3: Set the Right Parameters
Console ports don’t speak Ethernet or IP. Instead, they use good old-fashioned serial communication.
The standard settings are:
- Speed (baud rate): 9600
- Data bits: 8
- Parity: None
- Stop bits: 1
- Flow control: None
Mnemonic: 9600 8N1 (very common in networking).
Step 4: Connect and Wake It Up
Click Open. A black terminal window will appear. If it looks blank, don’t panic. Just press Enter once or twice, and boom—you should see the router or switch prompt like:
Switch>
Congratulations! You’re inside.
What You Do Once Connected
Through the console port, you can:
- Configure the device for the first time (hostname, IP addresses, passwords).
- Recover passwords if someone forgets them.
- Fix mistakes when the network is down.
- Save yourself when remote access (SSH/Telnet) is broken.
This is why console access is so sacred — it’s like the “reset button” for network engineers.
Real-World Analogy
Think of the console port like the emergency exit on an airplane. You don’t use it every day, but when you need it, you really need it.
- Remote access = walking through the front door of a house.
- Console port = climbing in through the basement window when you forgot your keys.
Best Practices for CCNA Students
- Always carry a console cable in your bag (seriously, veteran network engineers do this).
- Label your cables — they look like Ethernet, but they’re not!
- Memorize 9600 8N1 (those settings will haunt you in labs and exams).
- Don’t forget: you can’t ping a device until it has an IP address. Console is how you give it one.
Conclusion: Your Lifeline to the Network
If networking were a movie, the console port would be the opening scene. It’s where the story begins. Without it, your device is just a blinking box. With it, you bring the network to life.
So the next time you power up a Cisco device and see nothing but lights, remember: grab your console cable, fire up PuTTY, and start the conversation.
Key Exam Tips
Know the cable: Rollover (light blue) for older gear, USB for newer.
Settings: 9600 baud, 8 data bits, no parity, 1 stop bit, no flow control.
Purpose: Initial configuration, troubleshooting, and password recovery.
Terminal programs: PuTTY, Tera Term, SecureCRT, or Terminal on macOS/Linux.
Remember: You can’t use SSH/Telnet until the device has an IP and remote access configured
Most Important Things to Remember
Without console access, a “factory fresh” device is just a paperweight.
Console = first access.
Always know your 9600 8N1.
SUMMARY
What You Need to Talk to Your Cisco Device
- The Magic Cable
You can’t just grab any cable lying around (sorry, your iPhone charger won’t cut it). To connect through the console port, you’ll need the right piece of spaghetti:In short: it’s like dating apps — you need the right match or nothing’s going to connect.
- The classic light-blue RJ-45 to DB-9 console cable (old school).
- Or, if your laptop is modern and allergic to serial ports, a USB-to-DB-9 adapter.
- On newer Cisco gear, you might see USB mini-B or even USB-C console ports. In that case, grab the matching cable:
- USB Type-A to mini-B (the one that looks like it belongs to a camera from 2005).
- USB-C to RJ-45 console cable (for the “futuristic” models).
- The Brain (aka Your PC)
Your computer (or a laptop, or even a Raspberry Pi if you’re feeling fancy) is the other half of this dance. Requirements:And don’t forget: set it up with Cisco’s favorite combo, 9600 baud, 8 data bits, no parity, 1 stop bit, no flow control.
- A port — serial or USB, depending on the cable you picked.Drivers — the little translators that help your PC understand the adapter.Terminal emulator software — this is your chat window with the Cisco box. Popular choices:
- PuTTY (Windows classic).Tera Term (solid alternative).HyperTerminal (ancient but still around).On macOS/Linux, just pop open Terminal and use the
screencommand.
(Or, if you’re cool, just say 9600 8N1 and watch other CCNA students nod respectfully.)
What Did You Learn Today?
Let’s Find Out!
Instructions
- Select the correct answer for each technology concept.
- All questions pertain directly to the networking technologies explained.
- After answering, click “See Result” to see your score and feedback.
Lab C01T: Connecting to a Switch Using the Console Port
Lab Goal
By the end of this lab, you’ll be able to:
- Connect a PC to a switch using the console cable.
- Use a terminal emulator (Packet Tracer simulates this with the “Desktop” tab → Terminal).
- Configure basic settings like hostname and password.
Step 1: Build the Topology
- Open Packet Tracer.
- From the Network Devices → Switches, drag a 2960 Switch onto the workspace.
- From the End Devices, drag a PC onto the workspace.
- From Connections, choose the Console cable (it looks like a light blue cable).
Now connect:
- Click on the PC, connect to the RS-232 port.
- Then connect the other end to the Switch Console port.
Tip: Don’t use FastEthernet — console is not Ethernet. Use the console port (usually bottom left on the switch in Packet Tracer).
Step 2: Open the Terminal on the PC
- Click the PC.
- Go to the Desktop tab.
- Click on Terminal.
- A pop-up will appear with the connection settings.
Set them to the standard console defaults:
- Baud Rate: 9600
- Data Bits: 8
- Parity: None
- Stop Bits: 1
- Flow Control: None
Click OK.
Step 3: Enter the Switch Console
You should now see a black terminal window. Press Enter.
You’ll get the switch prompt:
Switch>
Congrats! You’re in the switch through the console.
Step 4: Basic Setup Commands
Let’s give the switch some personality and security. Type the following:
- Enter privileged EXEC mode:
Switch> enableSwitch#- Go into global configuration mode:
Switch# configure terminalSwitch(config)#- Change the hostname:
Switch(config)# hostname CCNA-SW1CCNA-SW1(config)#- Set a console password (so users must log in at the console):
CCNA-SW1(config)# line console 0CCNA-SW1(config-line)# password ciscoCCNA-SW1(config-line)# loginCCNA-SW1(config-line)# exit- Set an enable secret password (protects privileged mode):
CCNA-SW1(config)# enable secret classCCNA-SW1(config)# end- Save your configuration:
CCNA-SW1# do copy running-config startup-configCCNA-SW1# exit
Step 5: Test the Login
- Close the terminal.
- Reopen it.
- Now it should ask you for the console password (“cisco”).
- Once logged in, type
enable.- It will ask for the enable secret (“class”).
You just secured console access like a pro.
Extra Challenge (Optional)
If you want to push it further:
- Configure a MOTD banner:
CCNA-SW1(config)# banner motd # Unauthorized access is prohibited! # - Assign an IP address to VLAN 1 so you can later use SSH:
CCNA-SW1(config)# interface vlan 1 CCNA-SW1(config-if)# ip address 192.168.1.10 255.255.255.0 CCNA-SW1(config-if)# no shutdown - Test with a ping once you add another PC via Ethernet.
Key Takeaways from This Lab
You must use the console port for first-time setup.
Always remember the settings: 9600 8N1.
Configure both console password and enable secret for security.
Save your work withcopy running-config startup-config.
CCNA Exam Tip
In CCNA exams, they love to ask about how to access a device that has no IP address or no SSH configured. The answer is console connection.
[Return to CCNA Study Hub] — Next Stop: [Section 2 | Switch Diagnostics]