
Lab ID: LABS-PT-20260115-A7K3
Introduction
This lab is not pre-built. Build this entire lab in Packet Tracer. No templates ——you are responsible for the full topology and configuration. Prove it works by testing connectivity and validating every requirement. If you haven’t installed it yet or don’t know how to use Packet Tracer, go to: https://fromzerotoccna.com/packet-tracer/
Objective: Create a scenario that covers all the requested topic(s).
Configure a new router from scratch using the console connection (initial router setup). Then configure a basic LAN interface so a host can communicate with the router, and verify using show version, show running-config, show ip interface brief, and ping.
Cable Connections (Required): You MUST use correct cable types (console/rollover, straight-through). Assume Auto-MDI/MDIX is disabled. Device Renaming (Required): Rename devices to R1, SW1, laptop, PC.
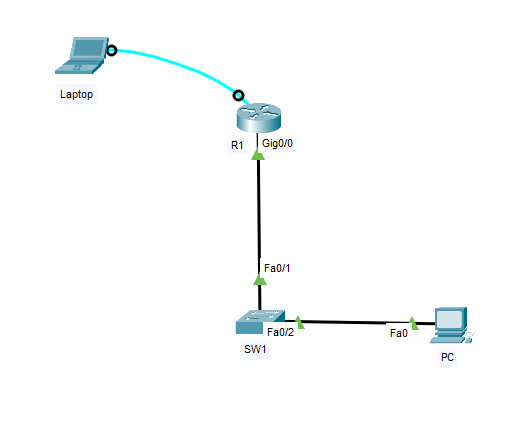
TOPOLOGY
Devices
- 1x Router: R1 (Cisco ISR in Packet Tracer, e.g., 4321/2911)
- 1x Switch: SW1 (2960)
- 2x PCs: Laptop (Console Laptop) and PC (LAN PC)
Connections (exact ports)
- Laptop RS-232 ↔ R1 Console
- Cable: Console (rollover) cable
- R1 G0/0/0 ↔ SW1 F0/1
- Cable: Copper straight-through (Auto-MDI/MDIX assumed disabled)
- PC NIC ↔ SW1 F0/2
- Cable: Copper straight-through (Auto-MDI/MDIX assumed disabled)
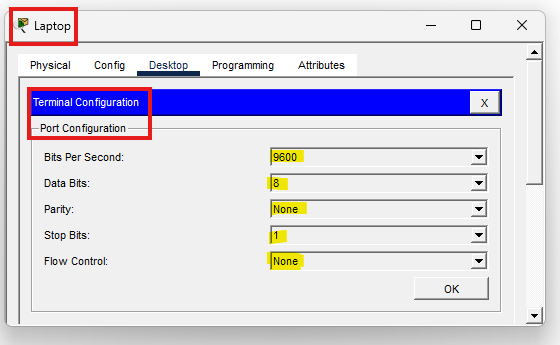
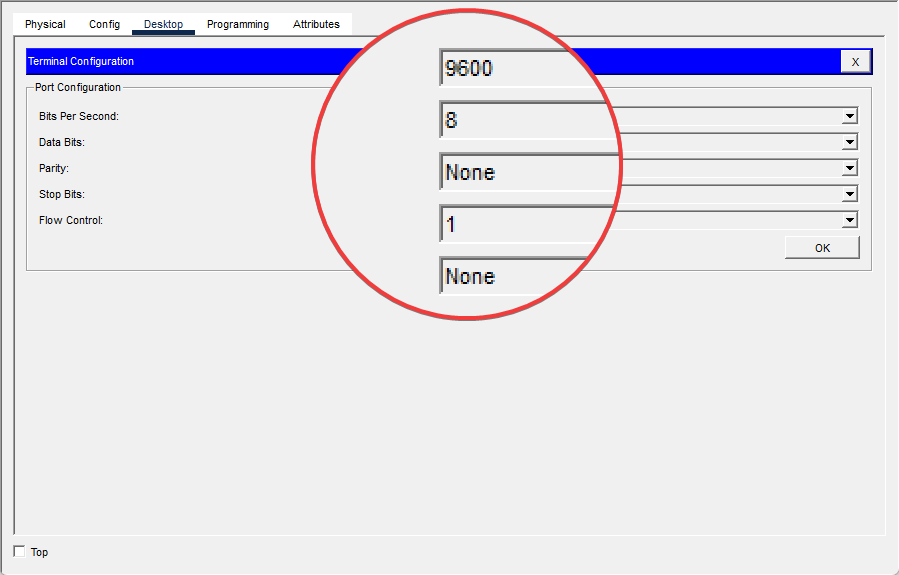
Console/Terminal settings (Laptop → Desktop → Terminal)
- Speed 9600
- Data bits 8
- Parity None
- Stop bits 1
- Flow control None
Command Summary (Packet Tracer CLI)
| Command | Description |
|---|---|
enable | Enter privileged EXEC mode |
configure terminal | Enter global configuration mode |
hostname R1 | Rename the router |
no ip domain-lookup | Prevent DNS lookup delays on typos |
enable secret <password> | Set encrypted privileged password |
service password-encryption | Encrypt plain-text passwords |
banner motd #...# | Configure a login warning banner |
line console 0 | Enter console line configuration |
password <password> | Set line password |
login | Require password on the line |
line vty 0 4 | Configure remote access lines |
transport input telnet | Allow Telnet (Packet Tracer-friendly) |
interface g0/0/0 | Enter interface configuration |
ip address <ip> <mask> | Assign IPv4 address to interface |
no shutdown | Enable the interface |
show version | Verify IOS, uptime, hardware info |
show running-config | Verify current configuration |
show ip interface brief | Verify interface status/IPs |
copy running-config startup-config | Save configuration |
ping <ip> | Test connectivity |
IP Address Table
| Device | Interface | IP Address | Subnet Mask | Default Gateway | VLAN | Notes |
|---|---|---|---|---|---|---|
| R1 | G0/0 | 192.168.10.1 | 255.255.255.0 | N/A | N/A | LAN gateway interface |
| SW1 | N/A | N/A | N/A | N/A | N/A | L2 only (no SVI needed) |
| Laptop | RS-232 | N/A | N/A | N/A | N/A | Console-only PC |
| PC | NIC | 192.168.10.10 | 255.255.255.0 | 192.168.10.1 | N/A | LAN test host |
Lab Tasks
Task 1: Console Access + First Boot Behavior
As the new network administrator, connect to R1 via the console port to gain out-of-band access, confirm you can reach the CLI, and verify the router is operational before applying configuration changes.
- Cable Laptop to R1 using the console/rollover cable.
- Use Terminal on Laptop with 9600 8N1, no flow control.
- If prompted for the initial configuration dialog, skip setup and reach the CLI.
- Run
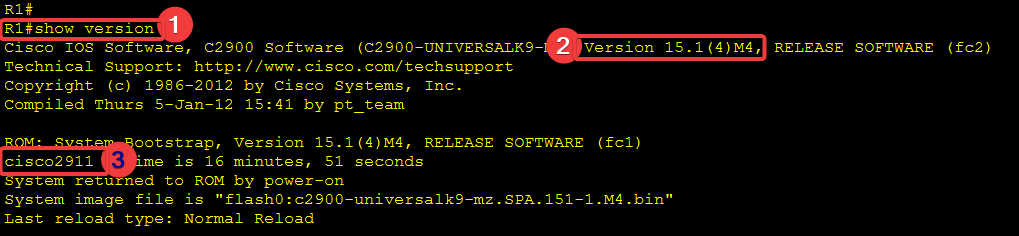
show versionto confirm the router loaded IOS.
Task 2: Bring Up the LAN Interface + Connectivity Test
Configure the LAN-facing interface on R1 with an IPv4 address, bring the interface up, and validate end-to-end connectivity between PC and R1 using show ip interface brief and ping.
- Configure R1 G0/0 with the IP in the table and enable it (
no shut). - Configure PC with the provided IP settings.
- Verify interfaces with:
show ip interface brief. - Ping from PC to R1 = 192.168.10.1 (and optionally from R1 to PC = 192.168.10.10).
Task 3: Initial Router Hardening + Identity
Configure initial router settings on R1 —set the hostname, disable DNS lookup delays, configure an MOTD banner (Unauthorized access prohibited!), secure privileged access (cisco123), enable SSH remote management: domain name “lab.local”, RSA keys (1024 or 2048), SSH v2, local user (console123), secure console/VTY access, verify the configuration, and save it.
- Enter global configuration
- Prevent DNS lookup delays
- Rename router
- Set banner
- Set privileged password + encrypt passwords
- Assign IP Address
- Create domain name for SSH connectivity
- Create local user for SSH
- Generate RSA keys for SSH
- Force SSH v2
- Secure the console
- Secure VTY (remote access) — SSH only
- Verify (R1)
- Test SSH from a PC (PC > Command Prompt)
- Save the configuration (R1)
Lab Solution
Task 1 Solution: Console Access + First Boot Behavior
PC1 (Console PC)
- Connect: Laptop RS-232 ↔ R1 Console (console/rollover cable) !generally turquoise/cyan (light blue) color.
- Go to: Desktop → Terminal
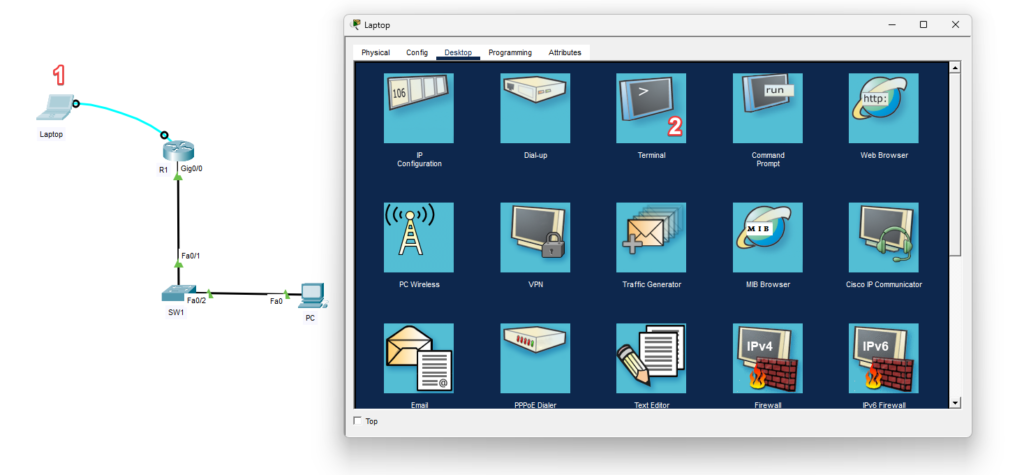
- Set:
- 9600, 8, None, 1, None
- If you see:
Continue with configuration dialog? [yes/no]:- Type:
no - (Or press Ctrl+C)
R1
- If you see
Router>enter privileged mode:enable - Verify IOS/hardware loaded:
show version
Task 2 Solution: Bring Up the LAN Interface + Connectivity Test
R1
Configure the LAN interface and enable it:
configure terminal interface g0/0ip address 192.168.10.1 255.255.255.0 no shutdown endVerify interface status:
show ip interface brief Success looks like: GigabitEthernet0/0/0 is up/up with 192.168.10.1.
PC2
- Go to: Desktop → IP Configuration
- Set:
- IP Address: 192.168.10.10
- Subnet Mask: 255.255.255.0
- Default Gateway: 192.168.10.1
Verification
- From PC → Command Prompt:
ping 192.168.10.1Success looks like: Replies received (0% loss). - Optional from R1:
ping 192.168.10.10
Task 3 Solution: Initial Router Hardening + Identity
On R1
Config
Router> enable
Router# configure terminal
Enter configuration commands, one per line. End with CNTL/Z.
Router(config)# no ip domain-lookup
Router(config)# banner motd #Unauthorized access prohibited!#
Router(config)# hostname R1
R1(config)# ip domain-name lab.local
R1(config)# crypto key generate rsa
The name for the keys will be: R1.lab.local
Choose the size of the key modulus in the range of 360 to 2048 for your
General Purpose Keys. Choosing a key modulus greater than 512 may take
a few minutes.

How many bits in the modulus [512]: 1024
% Generating 1024 bit RSA keys, keys will be non-exportable…[OK]
R1(config)# ip ssh version 2
R1(config)# enable secret cisco123
R1(config)# service password-encryption
R1(config)# username admin privilege 15 secret Admin123R1(config)# line console 0
R1(config-line)# password console123
R1(config-line)# login
R1(config-line)# exitR1(config)# line vty 0 4
R1(config-line)# transport input ssh
R1(config-line)# login local
R1(config-line)# exit
R1(config)# end
R1#R1# show running-config
R1# show ip ssh
R1# show run | section line vty
R1# show run | include username|aaa|ip domain-namePC2> ssh -l admin 192.168.10.1
Password: Admin123
R1#R1# copy running-config startup-config
Destination filename [startup-config]?
Building configuration…
[OK]Enter global configuration
enable
configure terminal
Prevent DNS lookup delays
no ip domain-lockupSet banner
banner motd #Unauthorized access prohibited!#Rename Router = R1
hostname R1Create domain name for SSH connectivity = lab.local
ip domain-name lab.localGenerate RSA keys for SSH
crypto key generate rsa! when asked, choose 1024 or 2048 (Packet Tracer usually accepts both)
Force SSH v2
ip ssh version 2Set privileged password
enable secret cisco123Encrypt passwords
service password-encryptionCreate local user for SSH
username admin privilege 15 secret Admin123Secure the console
line console 0
password console123
login
exit
end
Secure VTY
line vty 0 4
transport input ssh
login local
exit
end
Verify
show running-config
show ip ssh
show run | section line vty
ssh -l admin 192.168.10.1 (Test from a PC in Packet Tracer / On PC > Command Prompt:)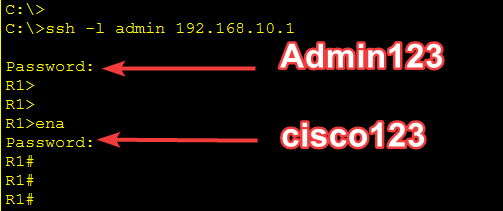
Save the configuration
copy running-config startup-config